1
How To Beamline Starting
Sven Augustin edited this page 2025-06-12 15:34:08 +02:00
Basic procedures to start the beam setup at Maloja
Aligning the beam to the end station
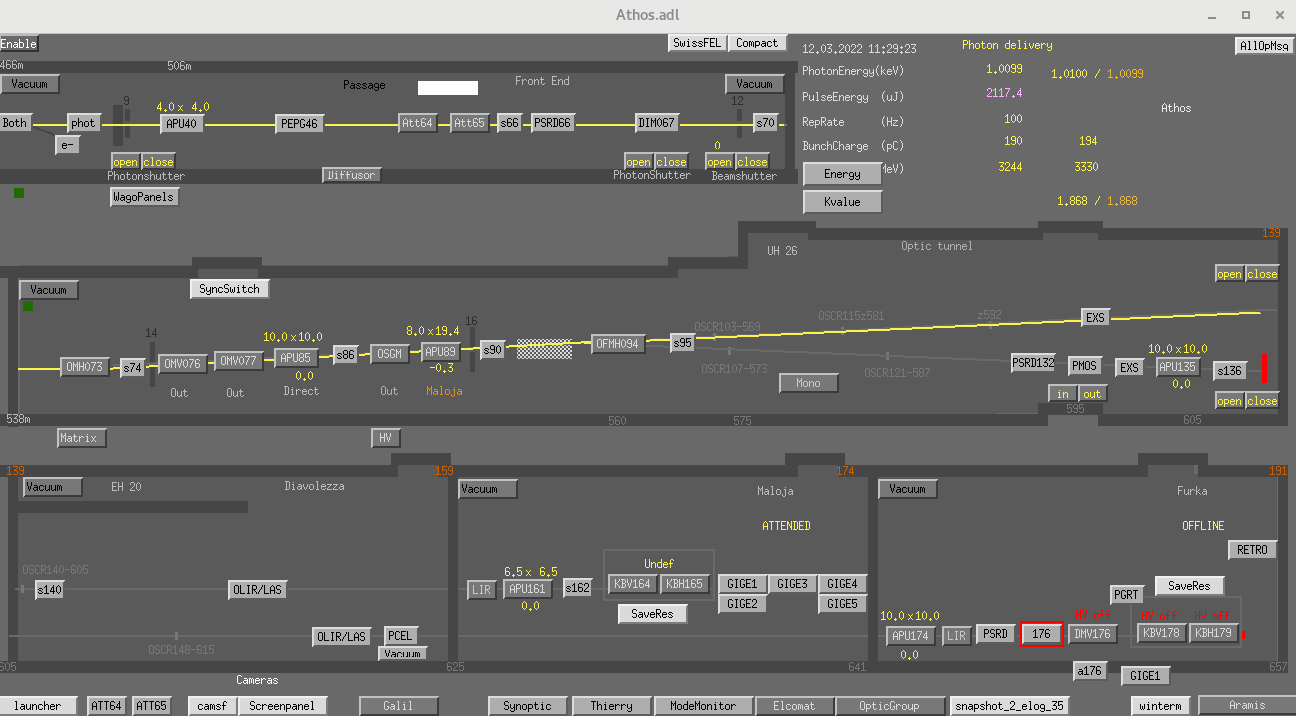
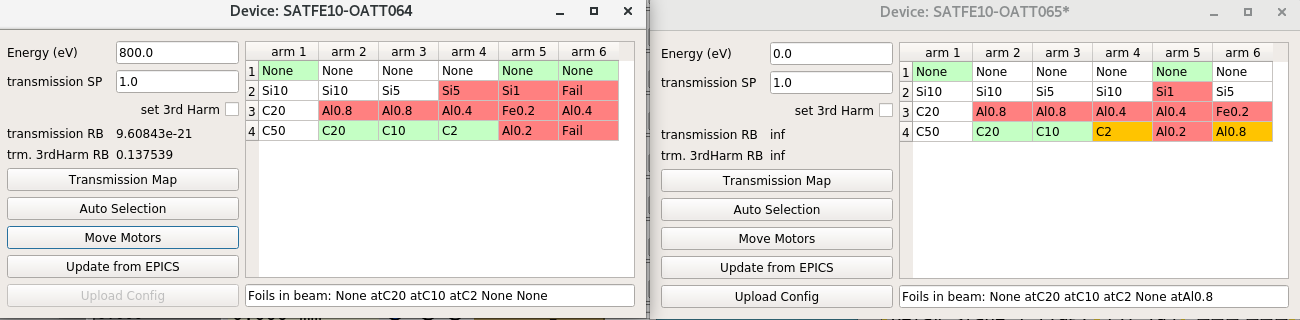
- Open the photonis panel in "Rolf's version (see picture above). Close the beam. Open athe windows of attenuators Att 64 and Att65 (they must be onpen in the other verion of the photonis panel, to be rechecked)) Every time any attenuator is moved the beam shutter must be closed)
- Set C2in both Al.0.8 in Att65.
- Move screen s66 in and open the camera display (using the sma e tools as for the Giges) and select PSCR066 in the drop-down menu.
- Open the slits before the attenuators (APU40). They are usually at 4x4 mm2. Close them to 2x2 mm2and see in the s66 if the beam is centered. if it is good, reopen them to 4x4 mm2. Close s66.
- Open screen s86. To move it in we need to click in "Nominal height" and go the the display as for s66.
- Open slits APU85. They are usually at 10x10 mm2. Close them to 2.5x2.5 mm2and see in the s86 if the beam is centered. if it is good, reopen them to 10x10 mm2. Close s86.
- Open screen s86. To move it in we need to click in "Nominal height" and go the the display as for s66.
- Open scren 162 (just before the KBs). To move the screen in, set it to "Pink". Open slits APU161. They are usually at 6.5x6.5 mm2. Close them to 2.5x2.5 mm2 and see in the s8161 if the beam is centered. if it is good, reopen them. If not open the mirror OMH073. We can adjust the vertical axis with the z rotation and the horizontal axis with the y rotation.
- Login slits positions.
Notes (28/01/2023):
- S95 does not work
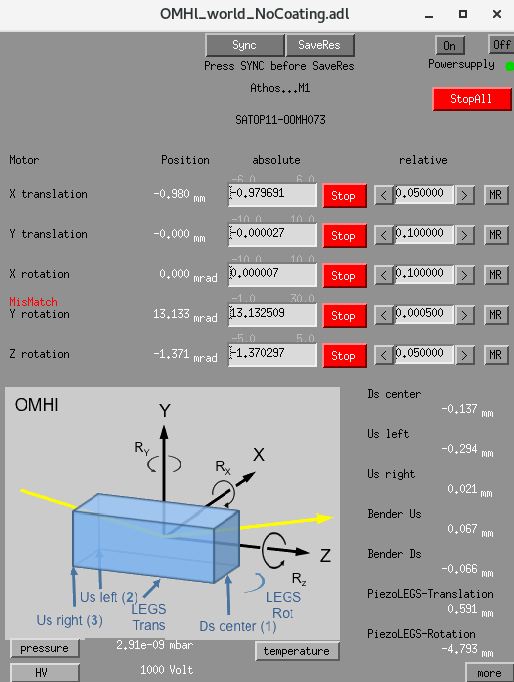
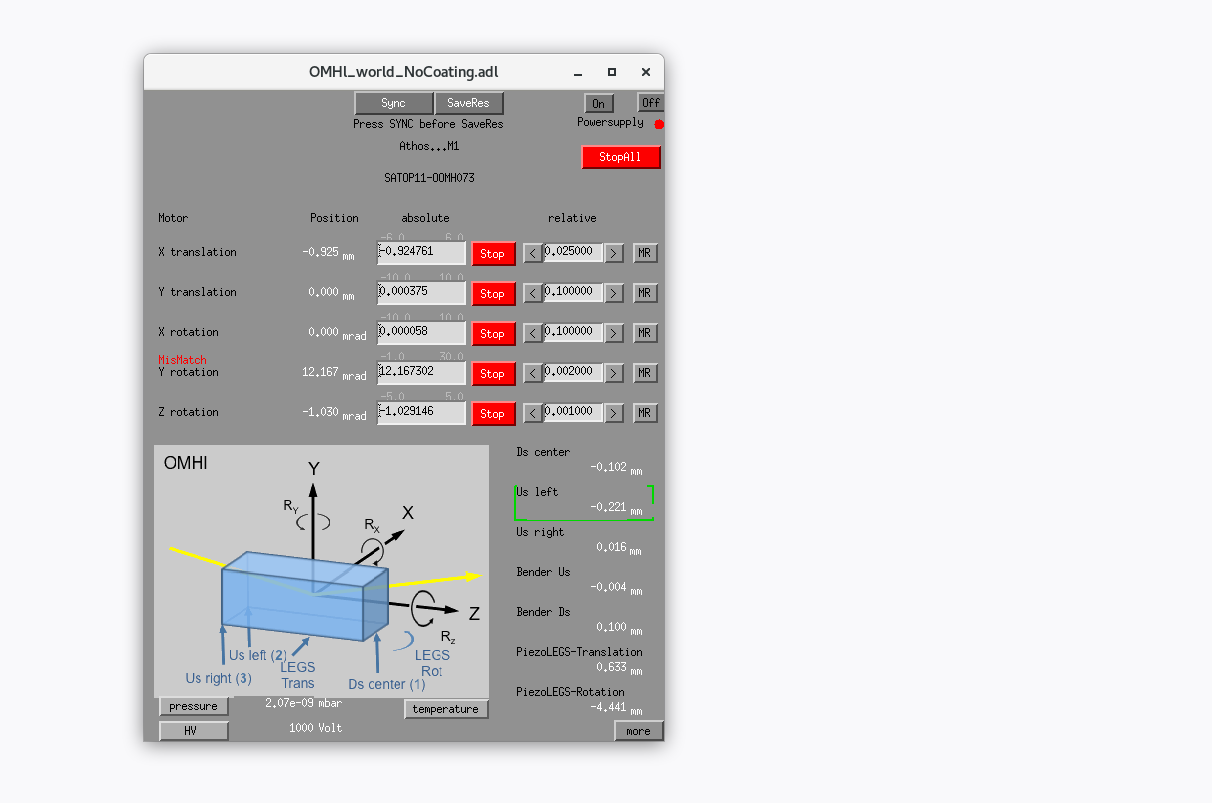
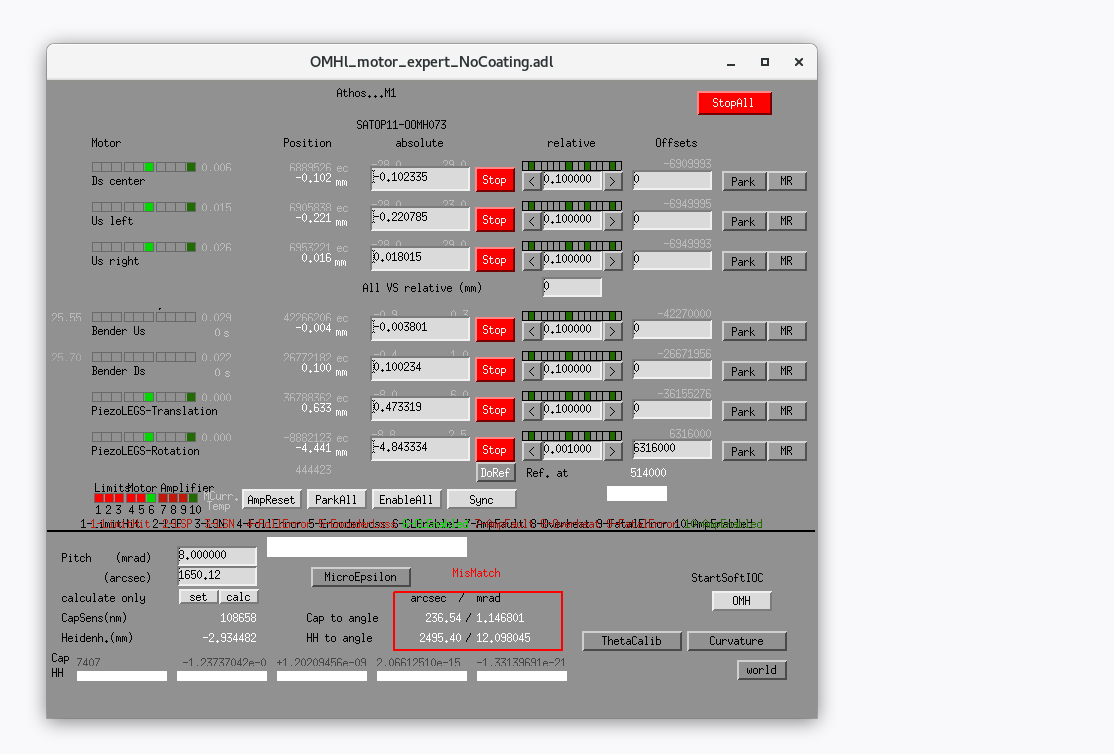
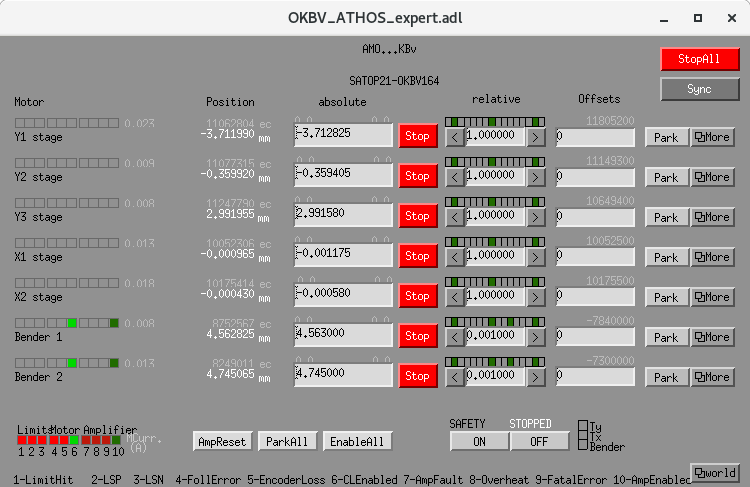
- In the mirror OMH073, there is a bug in the control panels ("world" versus "more"). The movement done for the same step is different (the conversion done for the moving is probably wrong in one of them). Please use the "more" version (the bottom figure), it seems that the "world" version is moving randomly.
Check focus on the corresponding YAG+high magnification microscope
- Close x-rays and move microscope and paddle with the YAG to position.
- Put C20, C10, C2 filters in both attenuators att64 and att65, and Al0.8 in att65.
- Open the camera that shows the microscope field of view (typically a GIGE)
- Open the KB mirror controllers KBV164 and KBH165.
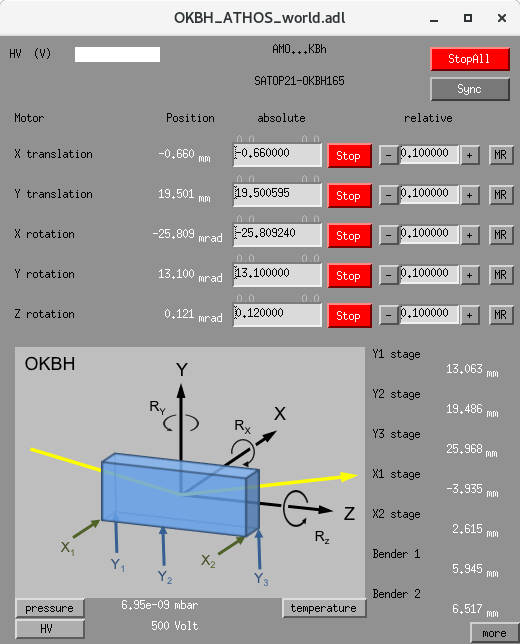
- Click "more" at the bottom right corner to open the good panel and adjust the focus: use benders (KB164 for x axis and KB165 for y axis) to adjust shape of beam until it is round and as small as possible.
Tips:
- If there are troubles finding the beam on the high magnification camera GIGE4. To solve this problem we make the X-ray beam larger by creating a diffraction pattern. To diffract the beam, the slit before the KB mirrors (APU161) was closed to a small aperture 0.2x0.2mm2 and more intensity in the beam was used. A large square diffraction pattern >100 microns fills the screen making it easy to trace the location of the x-rays relative to the microscope. Then we found the beam!